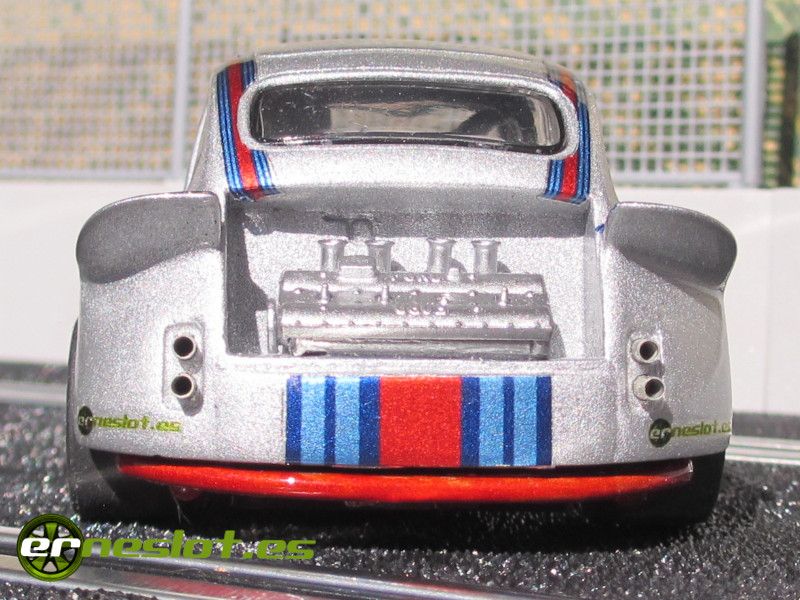
Fiat Abarth Subdesarroller III
A few years ago, I met the guy who unconsciously introduced me to the world of scratchbuilding and slot car decoration: Santiago Herrero, better known in the Iberian slot car world as Santi Ñapas. I say unconsciously because he didn't know me, and I didn't know him either. He had a website where he posted his slot car decorations and modifications, and they really caught my attention, so much so that I thought, "Well, I'll do the same," and that's how I started this hobby.
When I met him, he told me he was involved in organizing a very unusual race called the "Subdesarroller Proxy Race". It's a series of competitions throughout the year involving slot cars in the Proxy race format, a format quite common in the UK and the US but relatively unknown here in Spain. Basically, these are races in which slot cars compete, but the drivers don't drive their cars. The cars are sent to the race venues and raffled off among the local drivers and the car manufacturers themselves, if they travel to the race site. The venues are spread across Spain and feature a variety of circuits, from rally stages, semi-professional home tracks to large speedways, so the cars must be drivable under a variety of circumstances. In addition to the scores achieved by each car in the races, there is an additional score awarded during the Elegance Contest, in which the participants themselves rate their teammate cars. This score is used for the final classification as if it were the result of a regular race. The regulations are also quite unique, moving away from the typical rules of common competitions, giving more room to the manufacturer's imagination and establishing requirements for making cars that are reasonably drivable but far from what is usually understood as slot car competition, entering more into a gathering of geeks with their crazy cars, something like a wacky car race.
Anyone interested in learning more about this competition, which is now in its fifth edition, this time based on the SCX Porsche Carrera, can visit the Gnapaslot website.
For the third championship, held in 2023, the chosen cars were small four-seater cars manufactured until 1983 (the original model, not the slot car reproduction) with wheelbases equal to or less than 67 mm. This category included cars such as the Seat 600, the 850, the Fiat Abarth 1000 TCR, the Trabant Tramp, and the Mini, to name a few. All small and narrow. To try to level the playing field, the organizers developed fairly restrictive regulations regarding engines, weights, and dimensions, but which allowed for numerous modifications to the starting slot cars, as was evident when looking at the models entered into the championship. For those interested, the regulations for that year can be downloaded from this link.
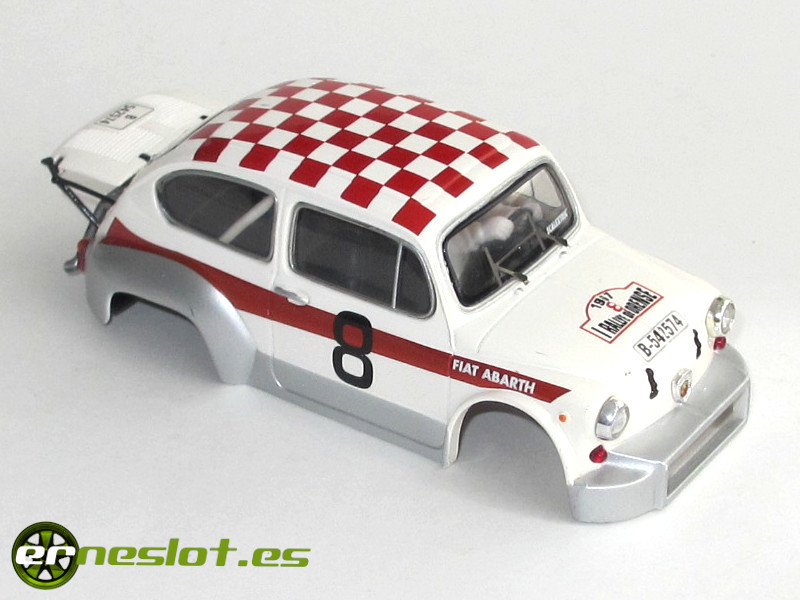
To participate in the championship, I started from a Scalextric Fiat Abarth 1000 TCR body to create an interpretation of the Porsche 911 that raced in the 1973 24 Hours of Le Mans. It's a car with a livery I love, and it also allowed me to widen the car to make it a little more competitive and easier to drive, as much as possible. This is the bodyshell I bought:
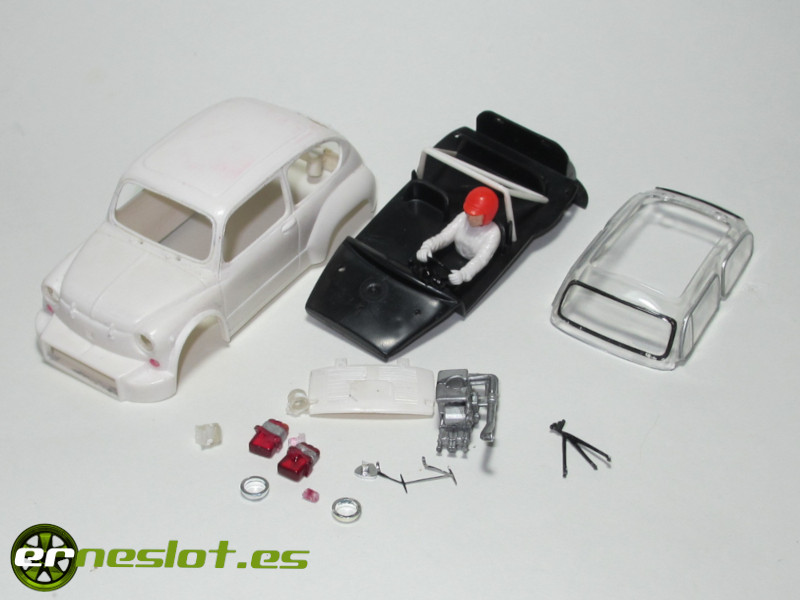
After disassembling it and removing all the paint, it looked like this:
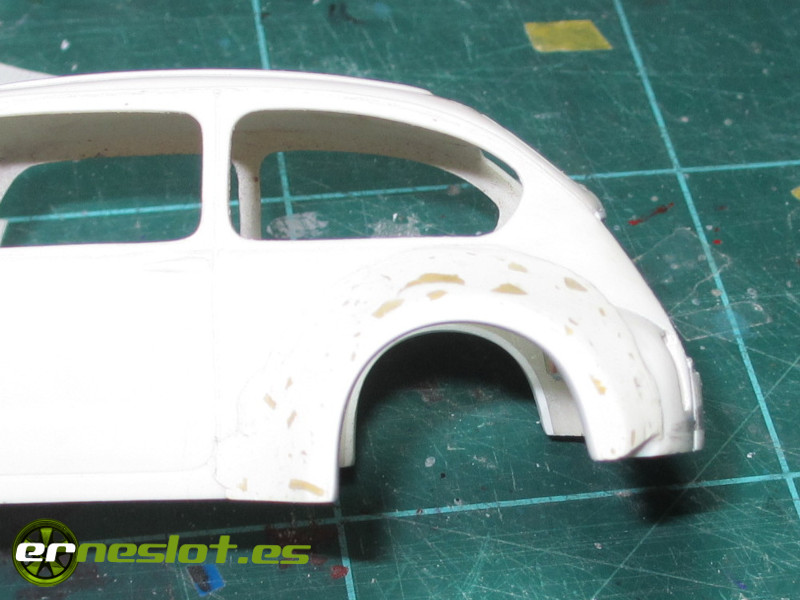
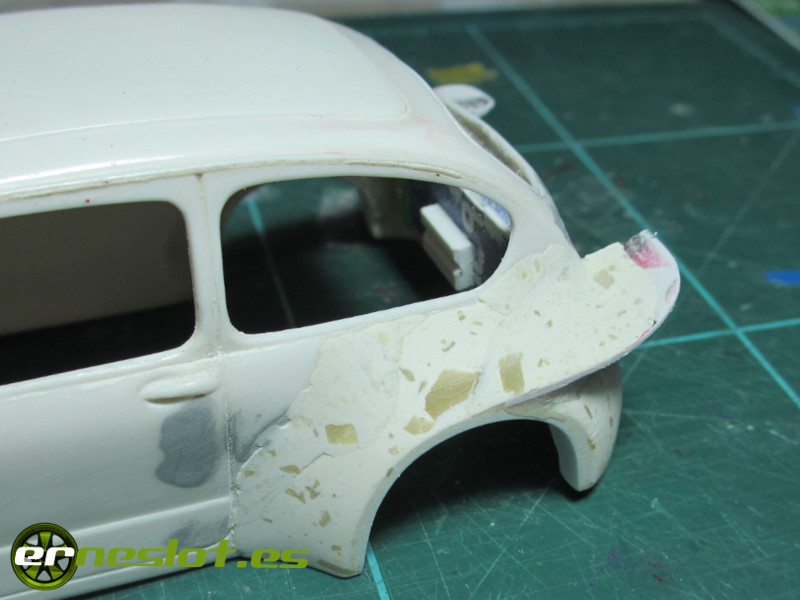
The first step was to widen the rear wheel arches with filler, as I've done so many times:
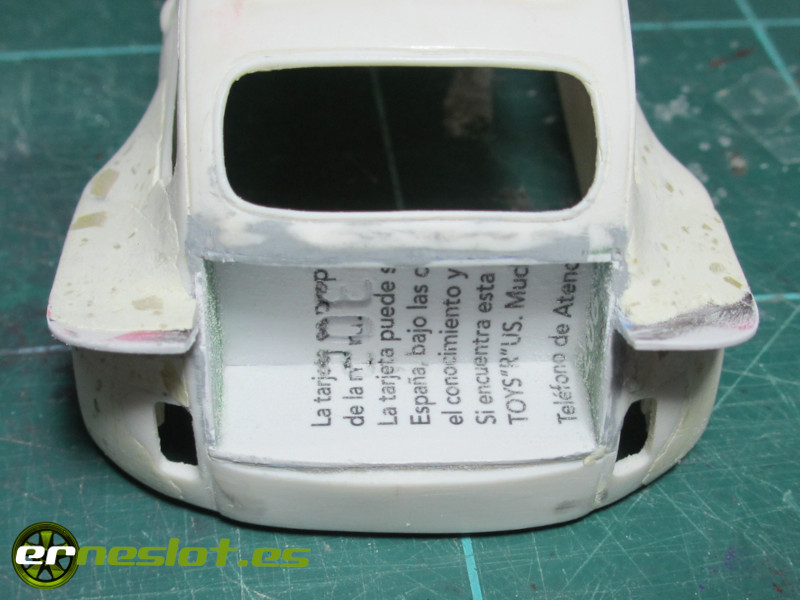
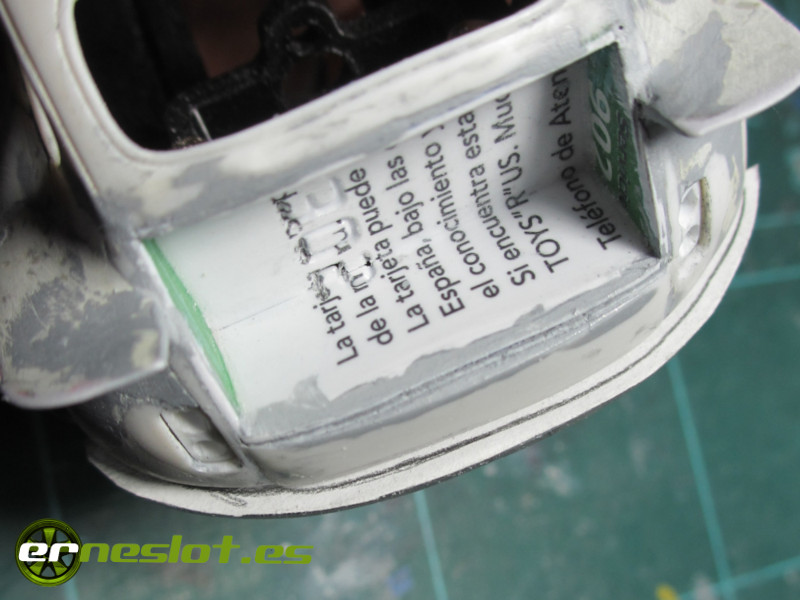
In the original slot car, the engine compartment was part of the tray that simulates the interior, but I wanted it to be a separate piece glued to the body, so I separated the engine compartment from the tray and built a new one with plastic sheets taken from old credit cards.
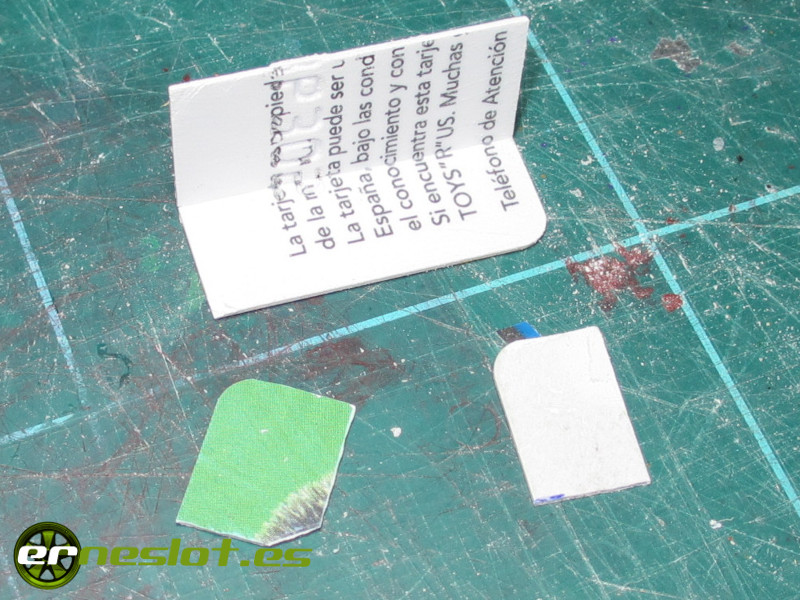
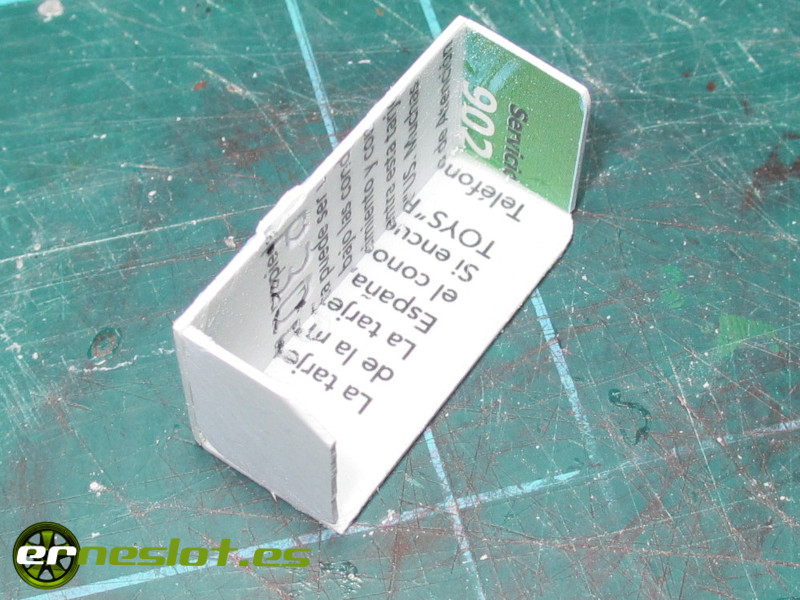
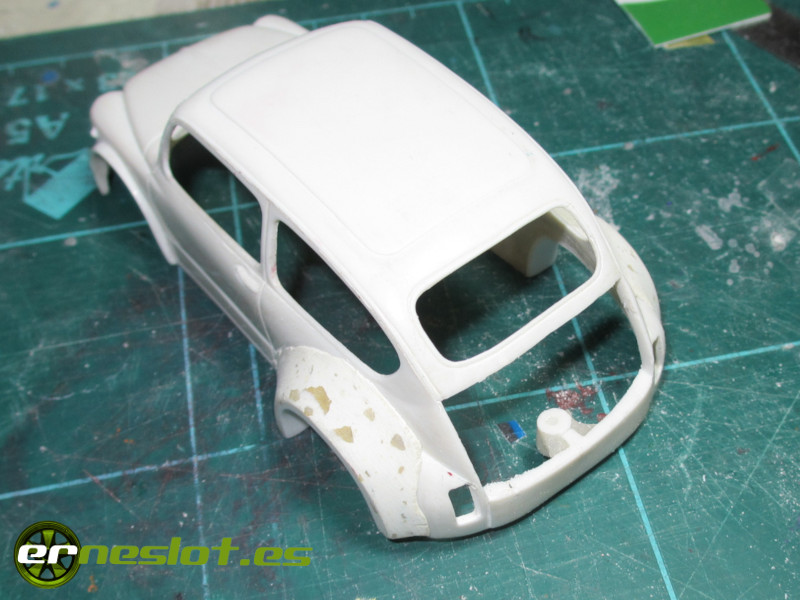
I enlarged the hole in the body by carefully filing it to fit the new piece properly:
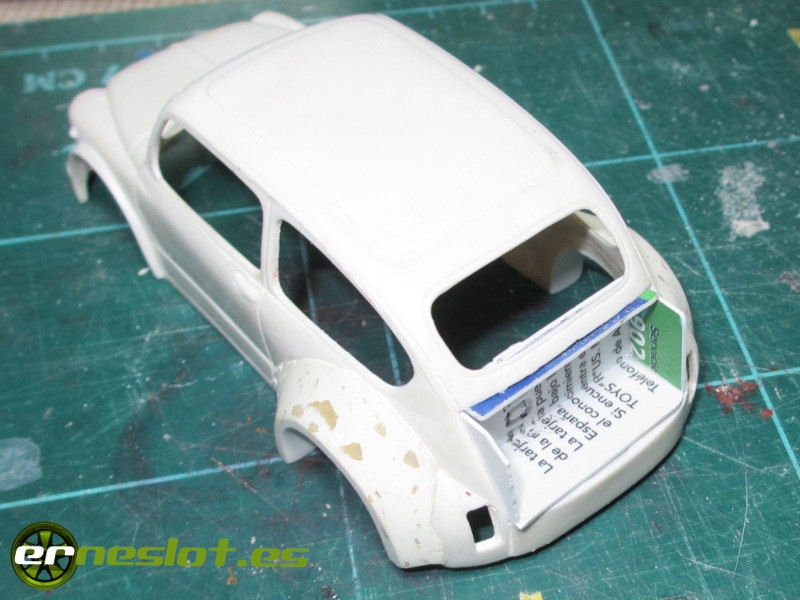
Then I glued the new piece:
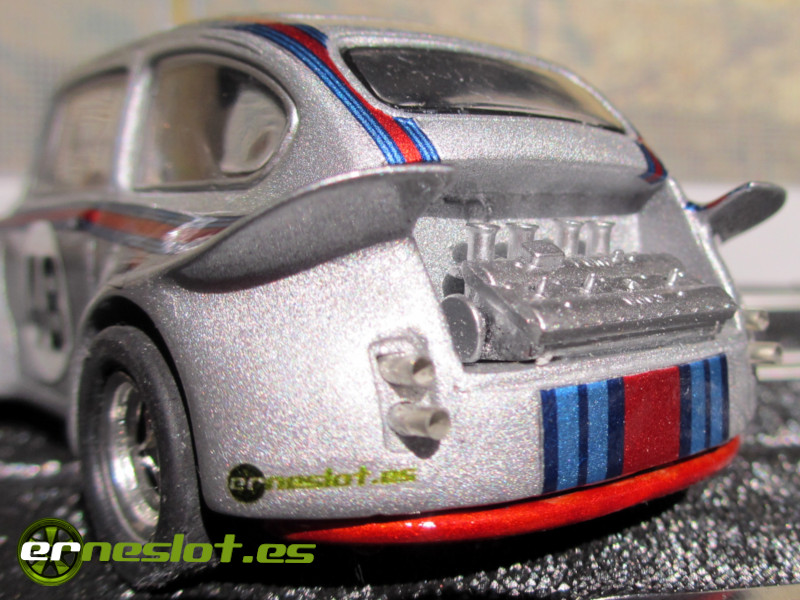
And to finish the rear end, I glued two pieces of plastic to the upper rear of the wheel arches, one on each side of the body, to simulate the characteristic fender wings that the Porsche 911 had at Le Mans in 1973.
With the rear end already defined in its basic shape, I moved on to making the modifications to the front end. I wanted to make some holes in the front bumper to simulate the air intakes for the brakes, and to adjust them as precisely as possible, I glued a piece of graph paper to serve as a guide so that the holes on both sides would be in the same position.
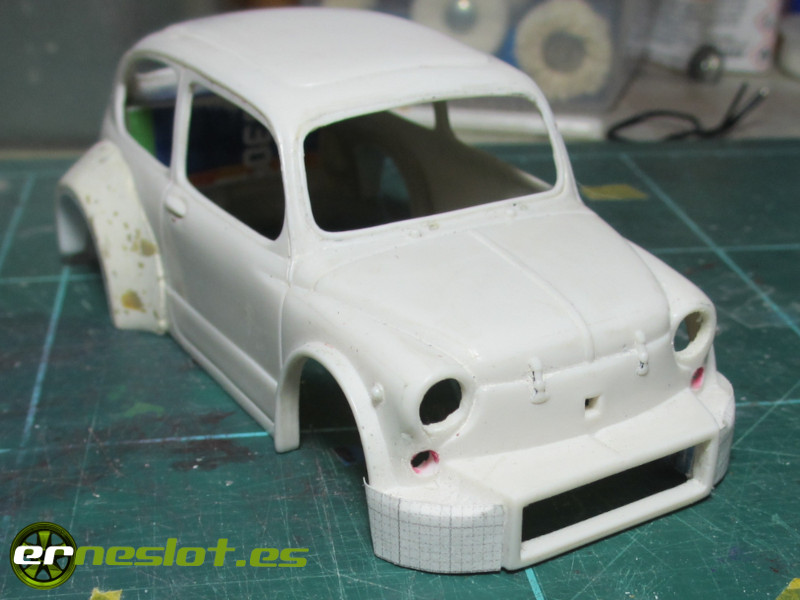
With the hole locations clear, drilling them was as easy as successively drilling with different diameter drill bits until reaching the desired size.
The next step was to glue a thin strip of plastic inside the front wheel arch to support the filler...
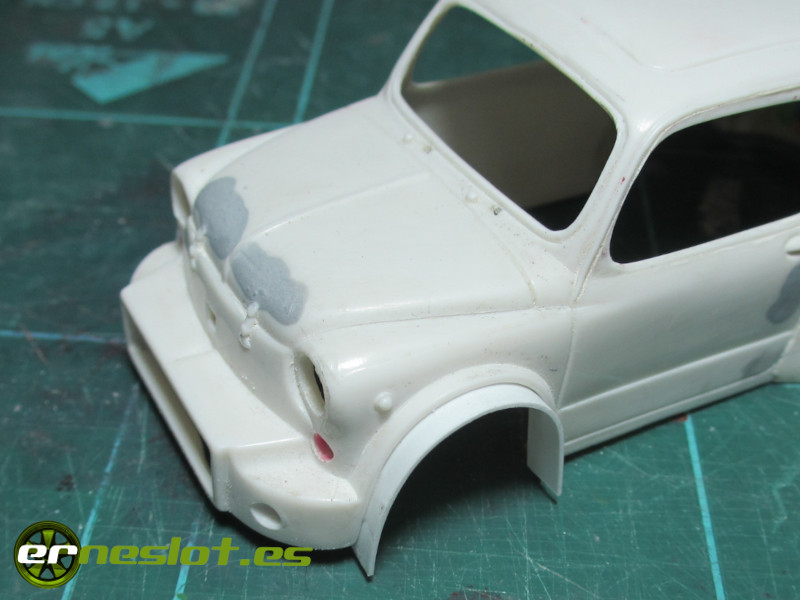
...and fill the entire area, then sand it to achieve the appropriate shape.
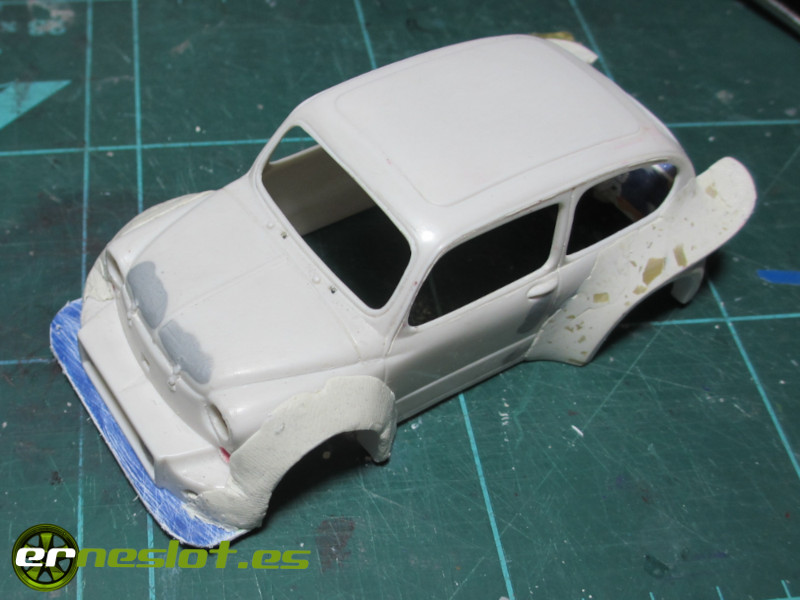
Finally, a little bit of Tamiya putty to correct any flaws and continue the work.
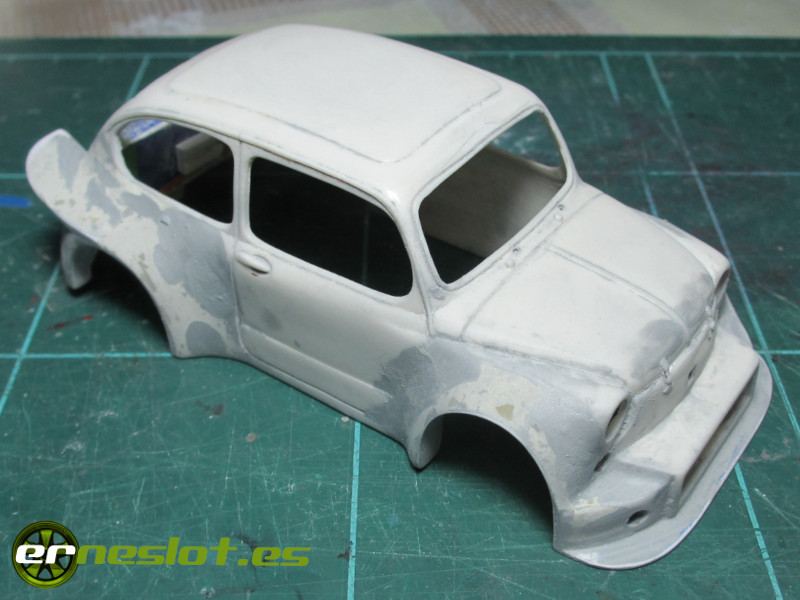
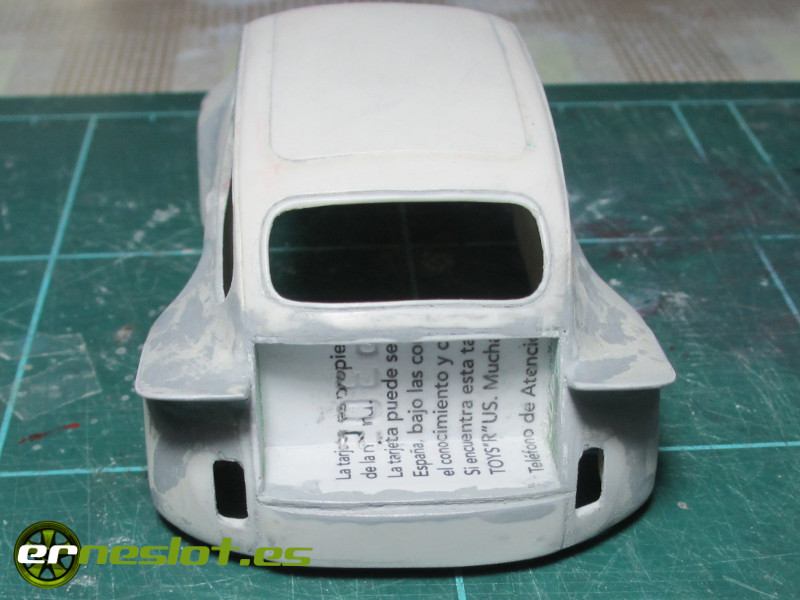
I wanted to give the rear of the car a change, and thought to place the exhaust pipe outlets where the original car's taillights were. Since I was going to simulate them with the hollow end caps used to terminate electrical cables, I made some brackets out of evergreen plastic, the same shape as the original lights, but with two holes to fit the terminals.
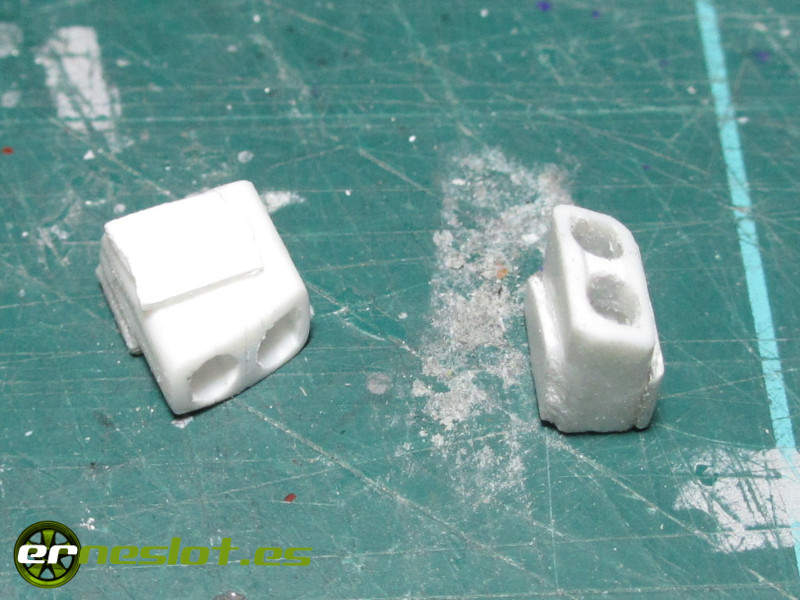
When they were in place, they looked like this:
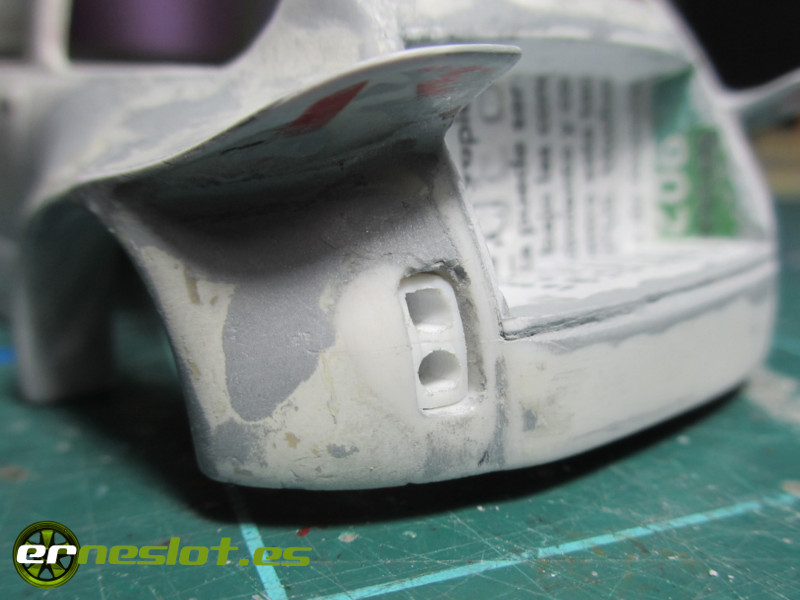
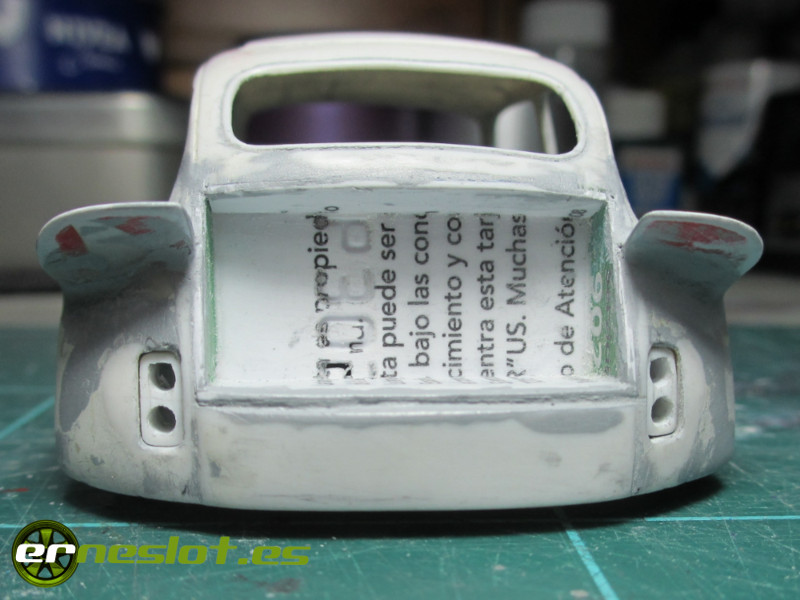
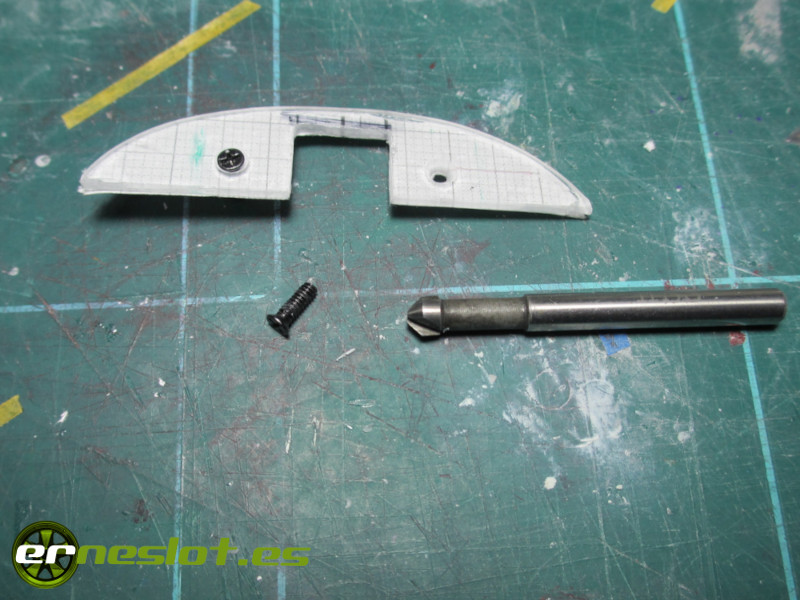
And since the car couldn't be left without taillights, I thought about adding a side-to-side light to the lower part of the body, like the ones currently used on the Porsche 911 (992 series). To do this, I cut a piece of clear acrylic from a 1.5 mm thick sheet...
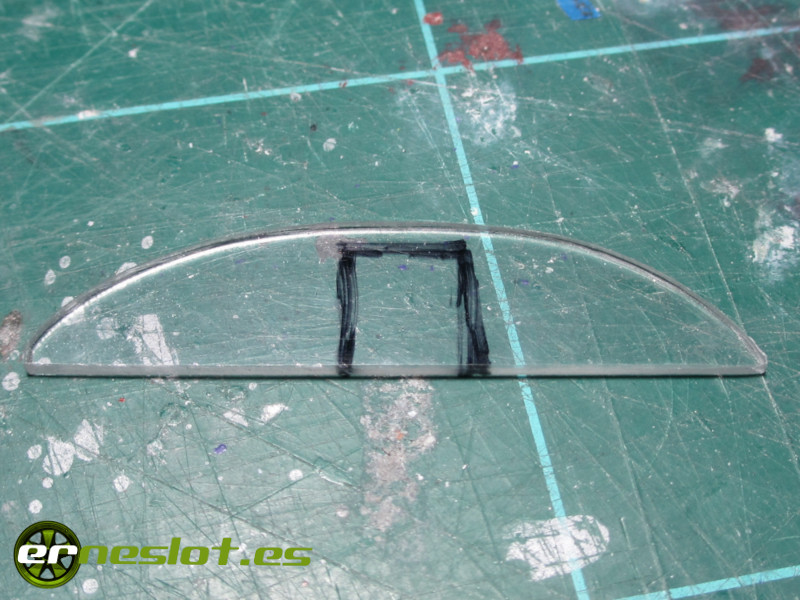
...to which I glued a piece of graph paper underneath to fit it correctly.
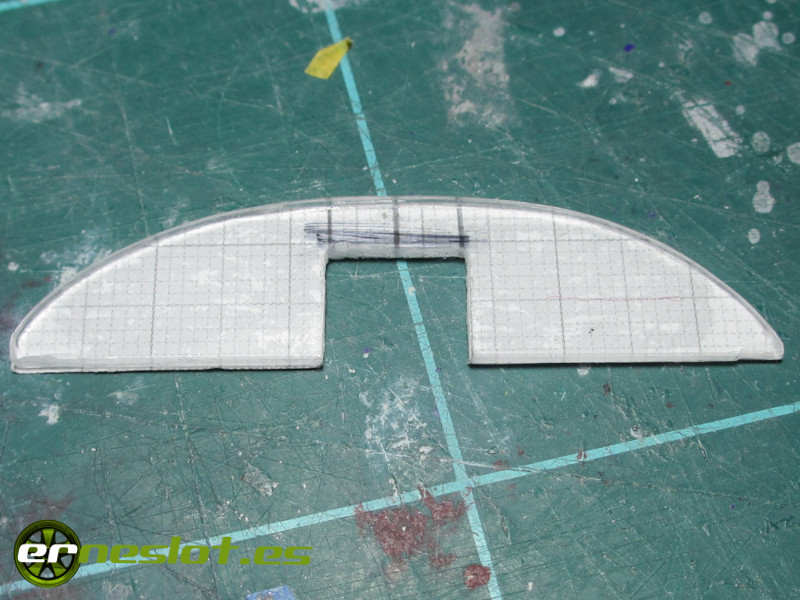
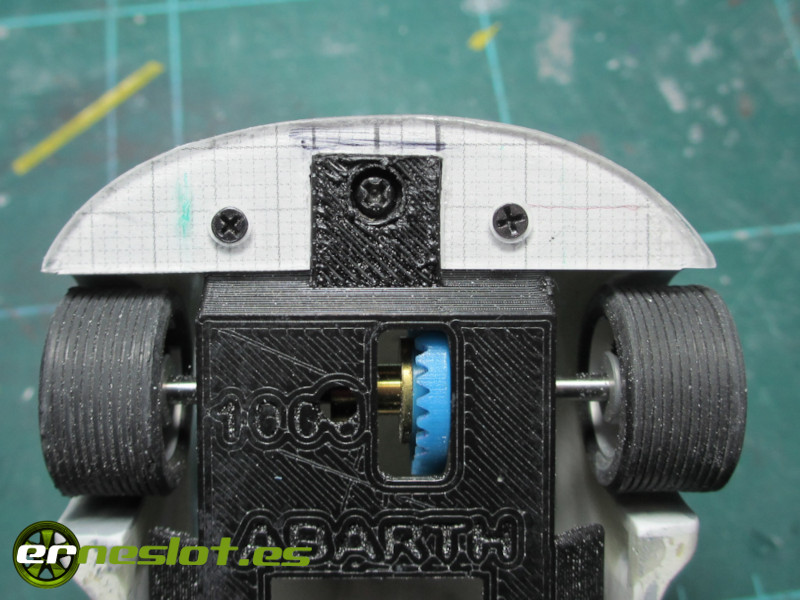
I marked the excess, placing the piece under the body and then cutting it out.
The graph paper also helped me to adjust the position of the holes to secure the piece to the chassis, because the piece simulating the taillight would be anchored to the chassis instead of the body.
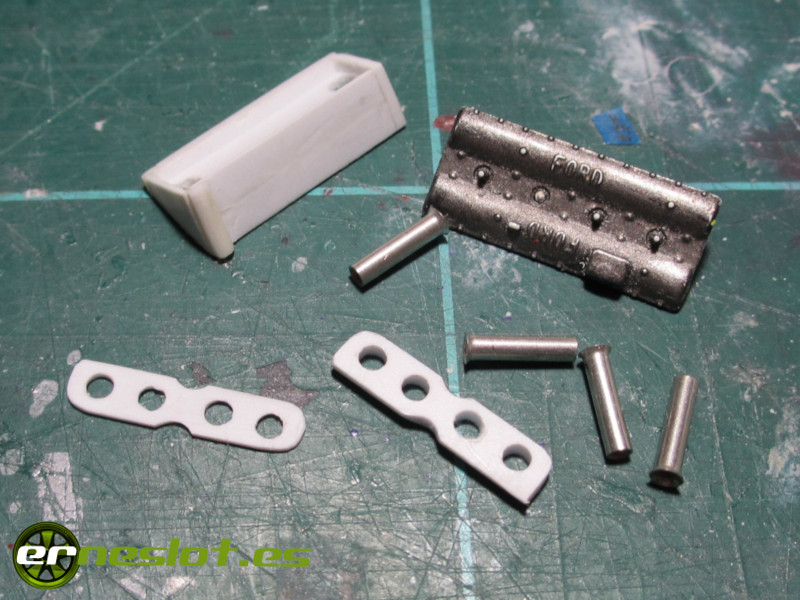
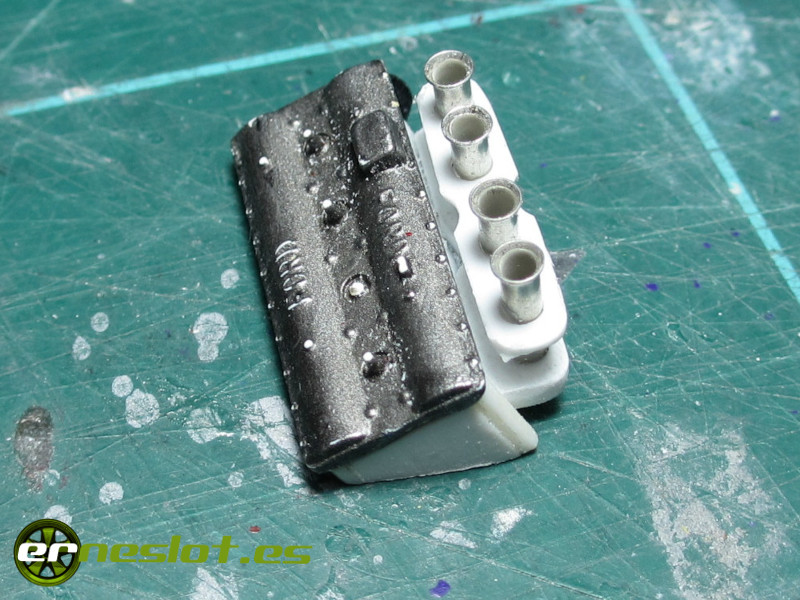
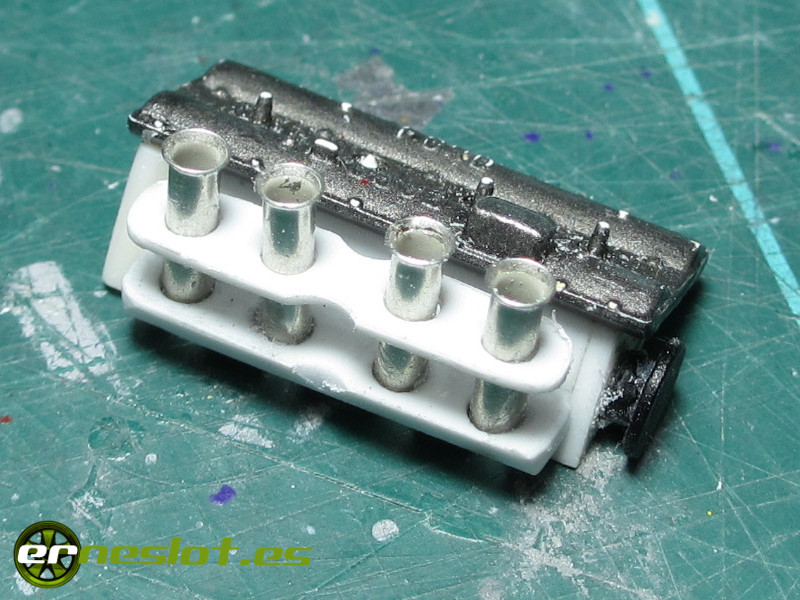
To finish off the bodywork, I built a simulated engine. I didn't want to use the original simulated engine and preferred to take a slightly more complicated route. I always have spare parts from other cars, and among them was the simulated cilinder head cover for the Cosworth DFV engines that powered most of the Scalextric F1 cars until the late 1980s. So I thought about fitting a inline-four Ford-Cosworth engine to the Abarth. Aside from the cilinder head cover, I built the rest of the block (what little is visible) with Evergreen plastic parts, and for the carburetor trumpets, I used four electrical terminals like the ones I'll use for the exhaust pipes. These are the parts I used to build the engine:
And this is how they looked once assembled before painting.
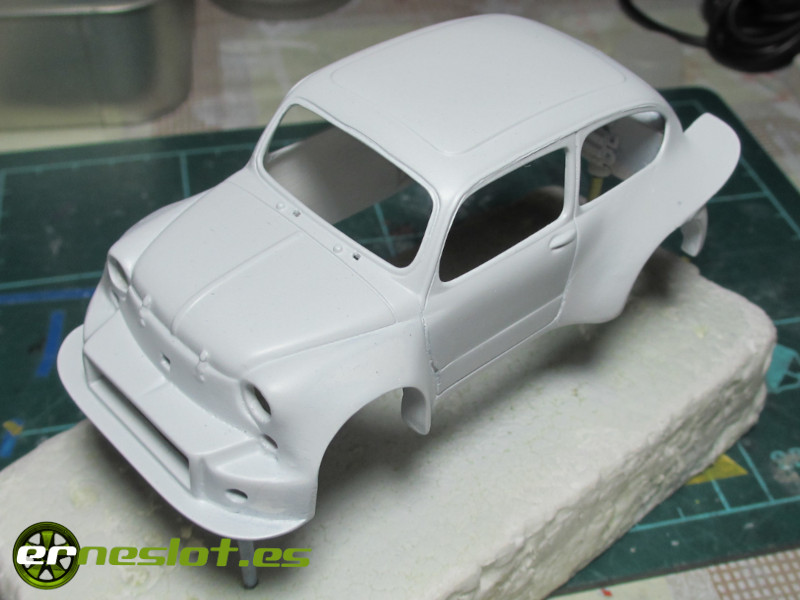
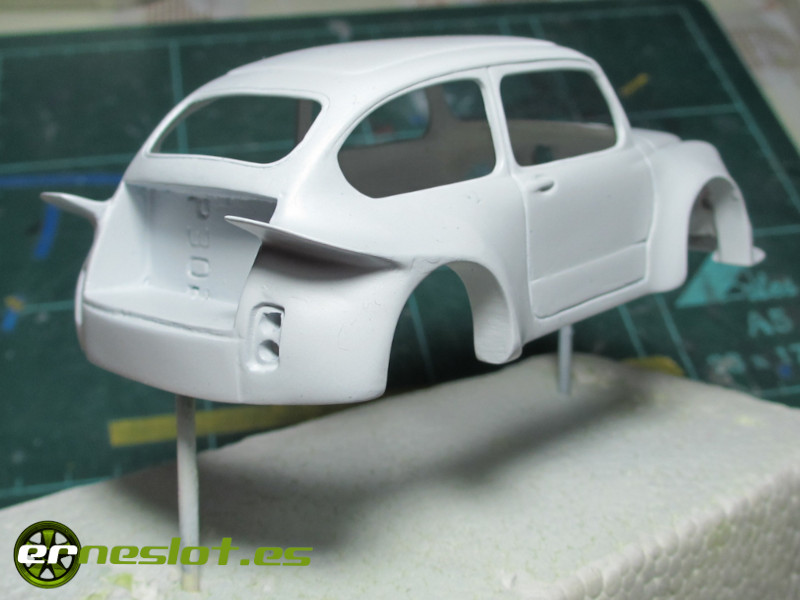
To finish the paint shop work, I applied a coat of gray primer (Duplicolor grey primer spray) to even out the surface and highlight any remaining flaws. I fix the few flaws that emerged with Tamiya putty and light strokes of fine-grit wet sandpaper.
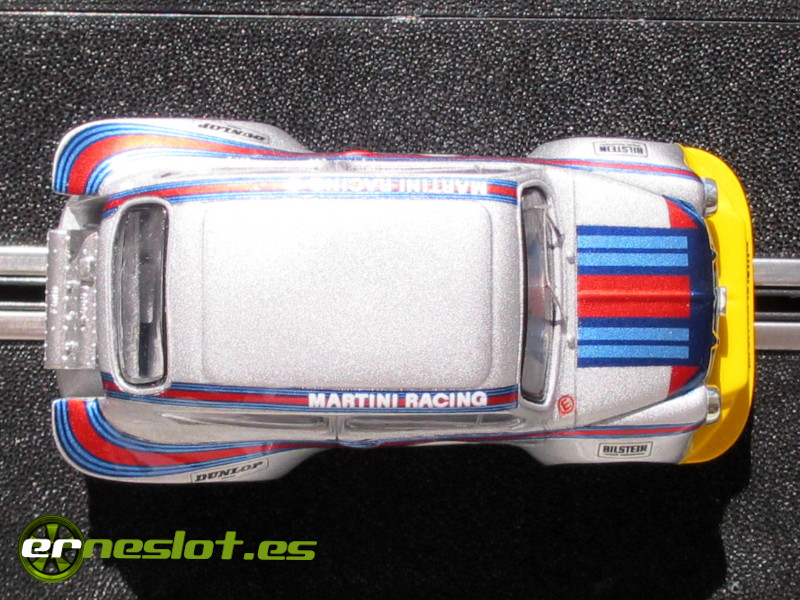
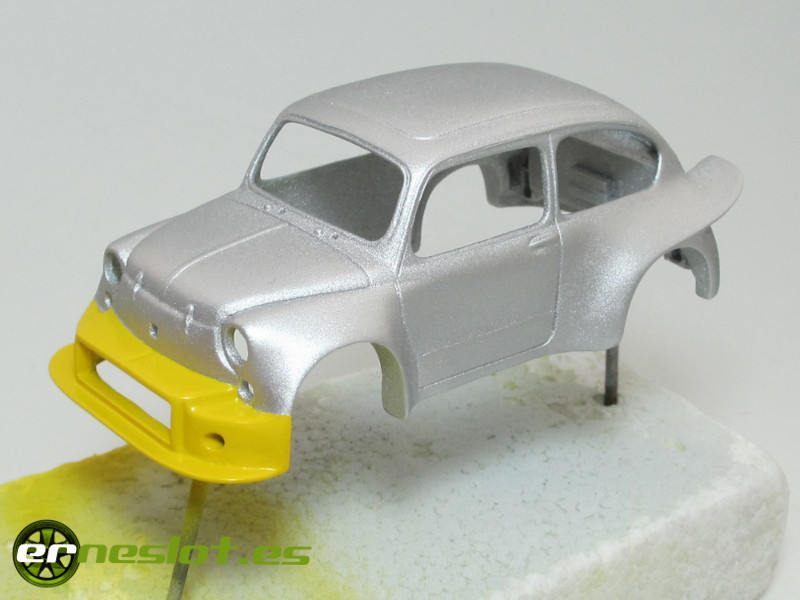
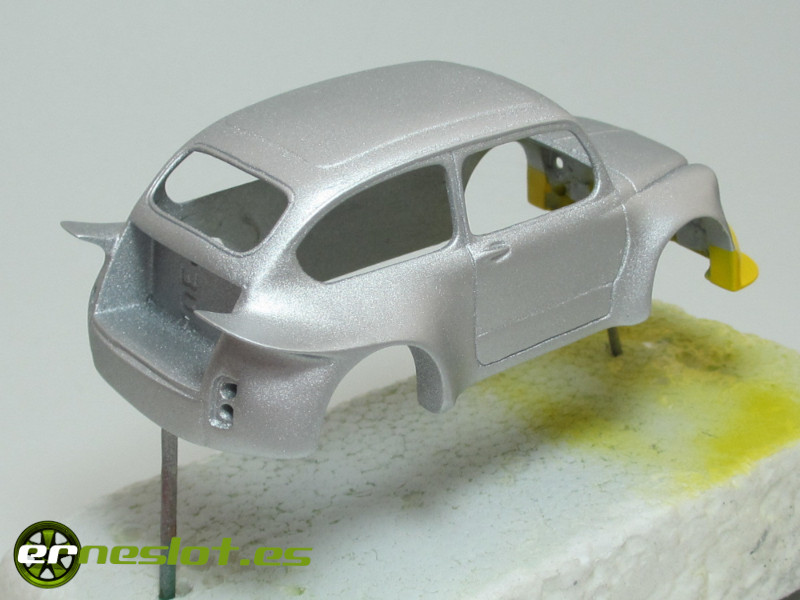
The livery was already decided from the start. As it was going to be an interpretation of the official 1973 Le Mans 24 hours Porsche 911 on a Fiat Abarth, the livery would follow the same scheme, the whole car painted metallic gray with the front bumper painted yellow, like the same Porsche that participated in the race with the number 47. So the paint scheme was quite simple, and since I didn't want to complicate things, I went with what I already knew: Tamiya acrylic colors applied with an airbrush. First, a coat of X-11 aluminum gray, and once completely dry, I masked the front bumper and painted it with yellow X-8 reference, achieving this result:
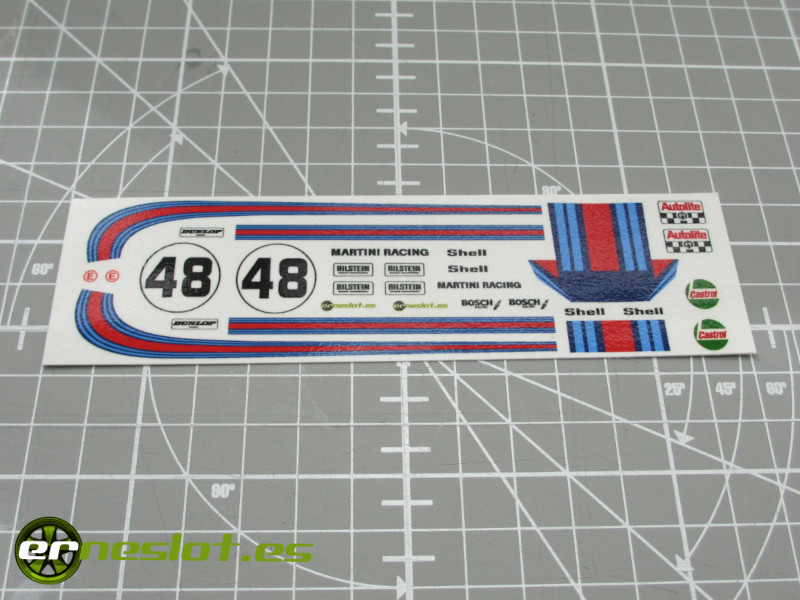
The rest of the livery is done with waterslide decals specially developed for the car, although they didn't take me much work since I started from the ones I had already made for the Porsche 911 3.0 Carrera RSR "Prototyp", so it was basically a matter of adjusting and adapting to the shapes of the FIAT. This was the set of decals I made once printed on transparent decal paper.
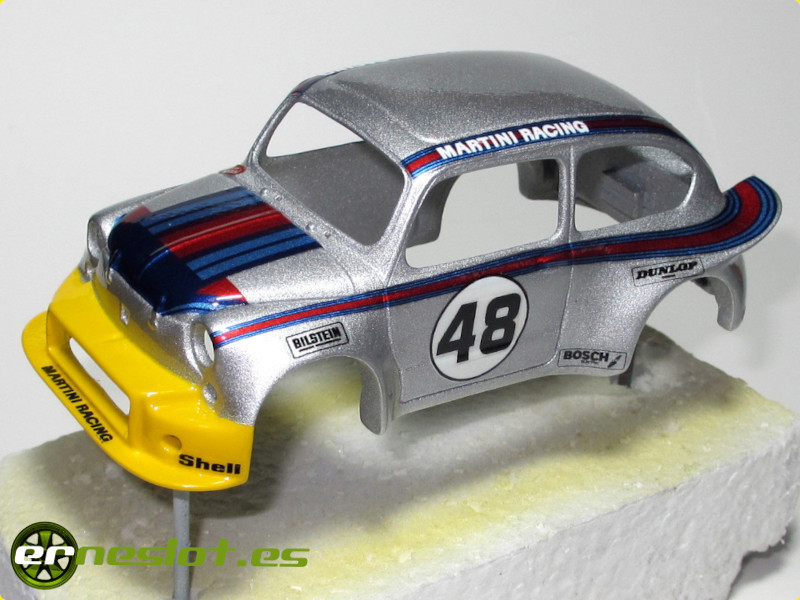
And so the car was fully decorated, with a couple of coats of automotive clear coat to protect the decoration.
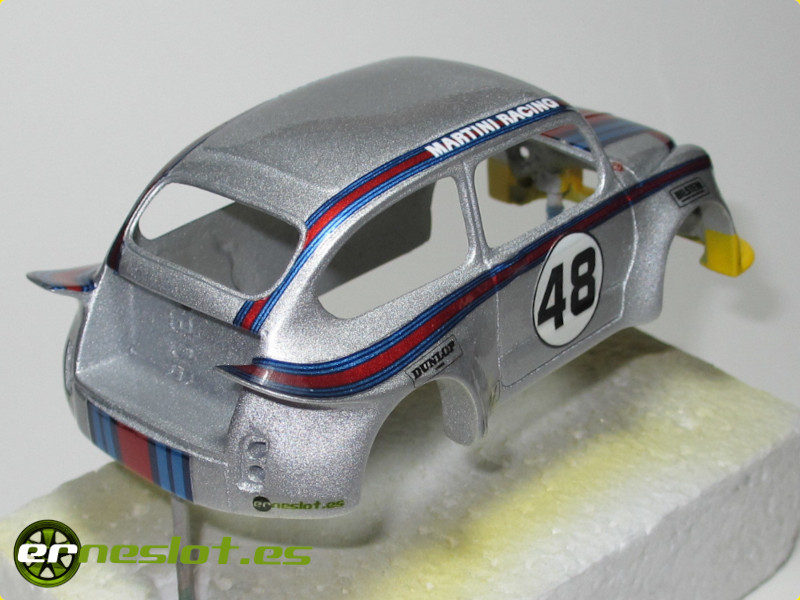
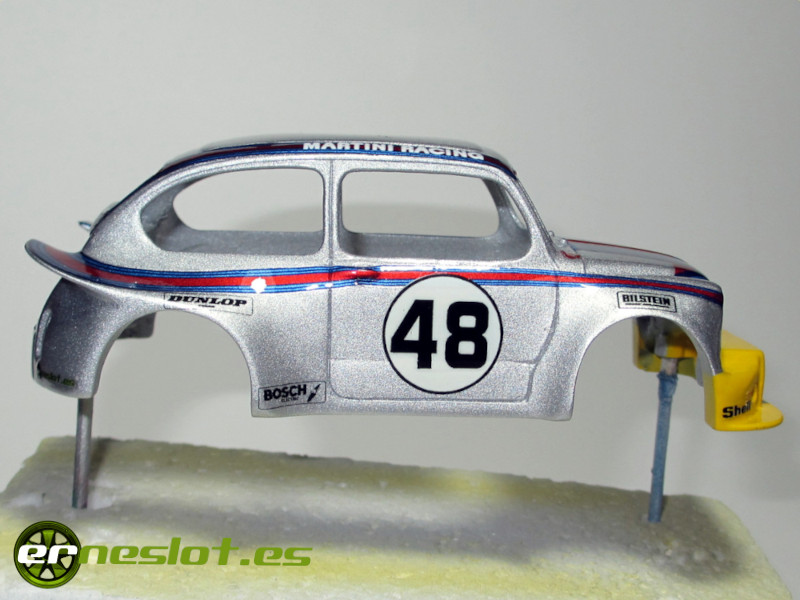
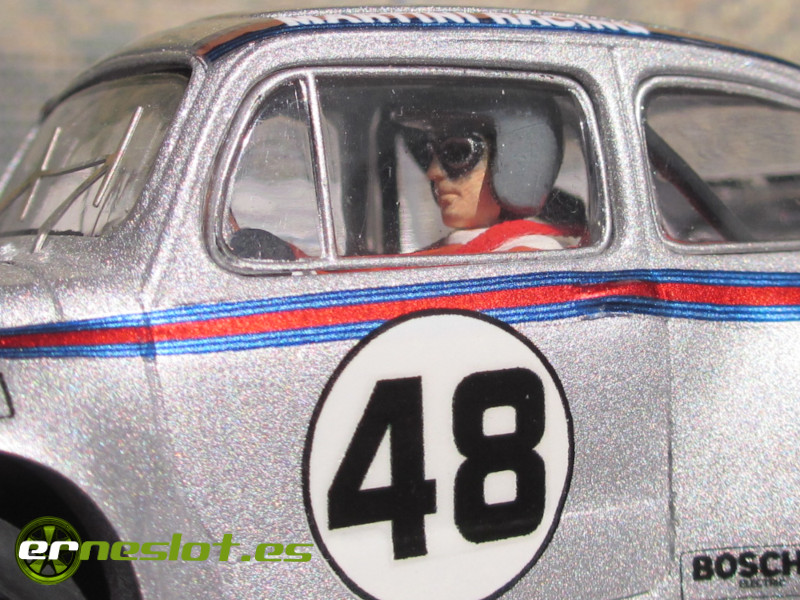
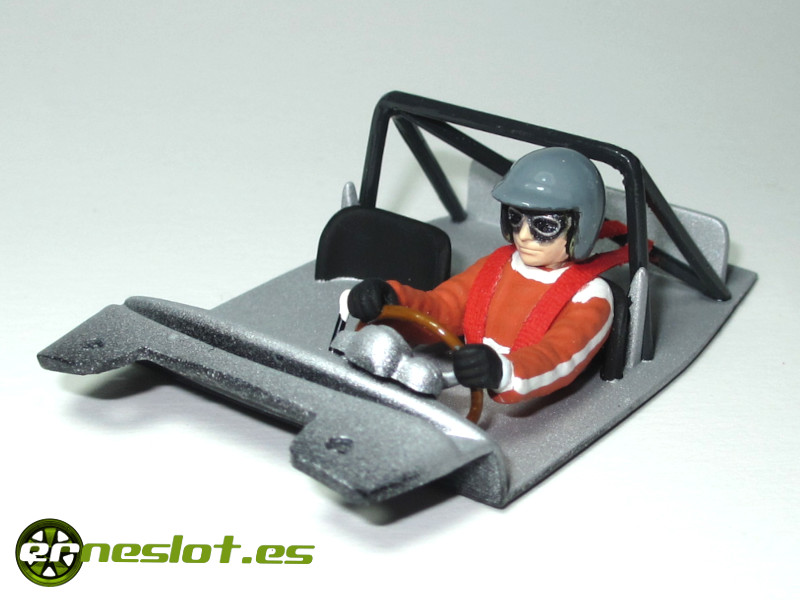
For the interior decoration, I painted the driver´s tray the same shade of gray as the body, also applied with an airbrush, and the rest of the details with a brush using Humbrol enamels, combining matte tones (like the driver's suit) with glossy ones (steering wheel, helmet, and roll bars). A fat-headed pin for the gear shift and a piece of tape painted with Vallejo red acrylic paint for the seat belts, and I achieved the result you can see in the following image.
Instead of using the car's original chassis, which I didn't have because I only bought the body to do the job, I used a 3D printed chassis from the manufacturer 3D SRP, also looking for a bit more track competitiveness than the original chassis offered.
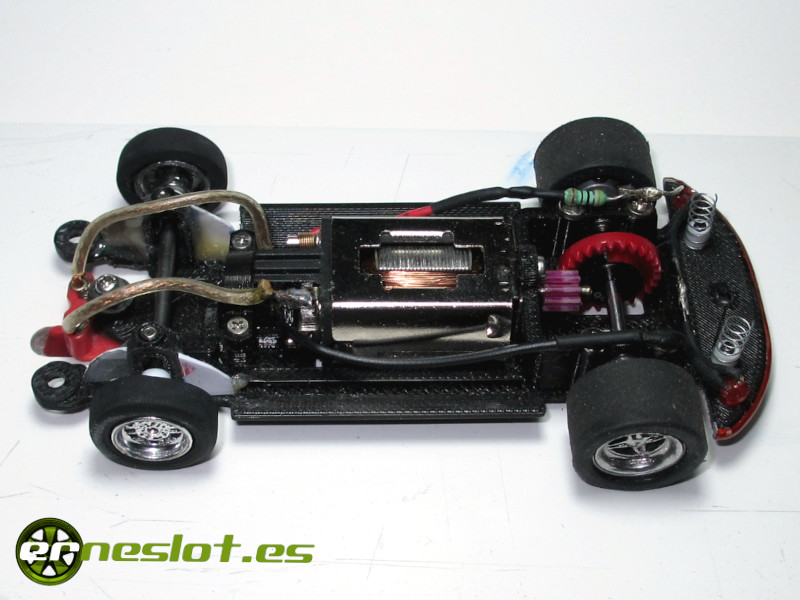
The engine chosen was an RX-4 with a 10-tooth nylon pinion from Cartix and a 26-tooth Avant Slot inline gear. The rear axle is calibrated with ball bearing bushings and 14.6-inch Sloting Plus rims (reference SP021108), to which I fitted polyurethane resin inserts urethane casted from some Superslot Metro rims and Mitoos M001 tires. On the front axle, I used one from the box of miscellaneous parts, I think it's from Superslot, to which I attached two Reprotec FIAT Abarth rims that I've had stored since I built the 850 coupé, about 13 years ago... In the end, everything can be used.
I painted both the front rims and the rear inserts with Green Stuff World Chrome Metal, which gives a spectacular and very realistic chrome finish, although the process isn't quick. Basically, the steps are:
- Paint the piece to be "chromed" with gloss black, making sure it's as smooth as possible. I usually do this with Humbrol Gloss Black, which leaves a very fine and even finish. Let it dry thoroughly before continuing. I usually leave it at least three days because the enamel takes a long time to dry completely.
- Once the black paint is completely dry, apply the Chrome Metal paint with an airbrush in very fine strokes. Shake the can well before pouring it into the airbrush cup so the paint is well mixed, and use very fine strokes without over-coating. The paint is very liquid, and it's easy to over-coat the piece. The chrome effect also appears when the piece dries, so you have to be patient when applying it. It dries very quickly, so you only have to wait a few minutes to see the final result.
- Let it dry completely before handling the chrome-plated pieces. Again, I wait at least three days before putting the pieces in place. Once dry, it's very resistant to handling, but I try not to push the limits of the paint's resistance to avoid unpleasant surprises. Green Stuff World has a protective varnish for this type of paint, but I haven't used it and can't comment anything on the results.
The photo also shows how I reinforced the front axle support with some plastic pieces I keep in the box of scraps because I thought it was a bit weak, glued with epoxy glue. I didn't even bother painting it, as you can see. Some Ninco cables I also had stored away and a Scaleauto forward guide (reference SC-1608B) were the rest of the car's mechanical components.
The body assembly ended with:
- The gluing of the simulated engine not painted with Green Stuff World's Chrome Metal, but with the chrome color reference 77.707 from Vallejo's Metal Color range. The process was similar to the one I followed for the wheels. The resulting tone was somewhat more muted than the Green Stuff World paint, but still very good, and perhaps more suitable for an engine.
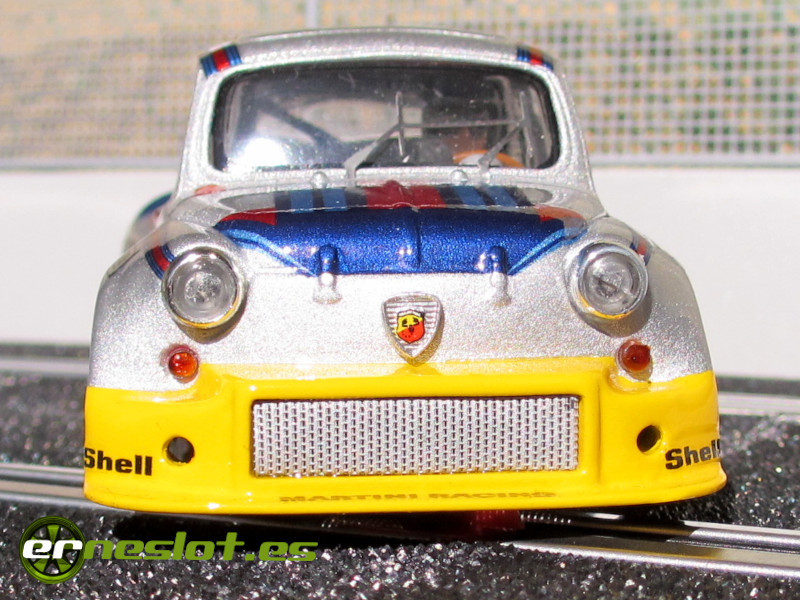
- The front grille, taken from the shadow mask of an old CRT television, was painted with Humbrol silver enamel and glued on the inside with a bit epoxi glue.
- The rest of the bodywork accessories were glued on: headlights, turn signals, exhaust pipes...
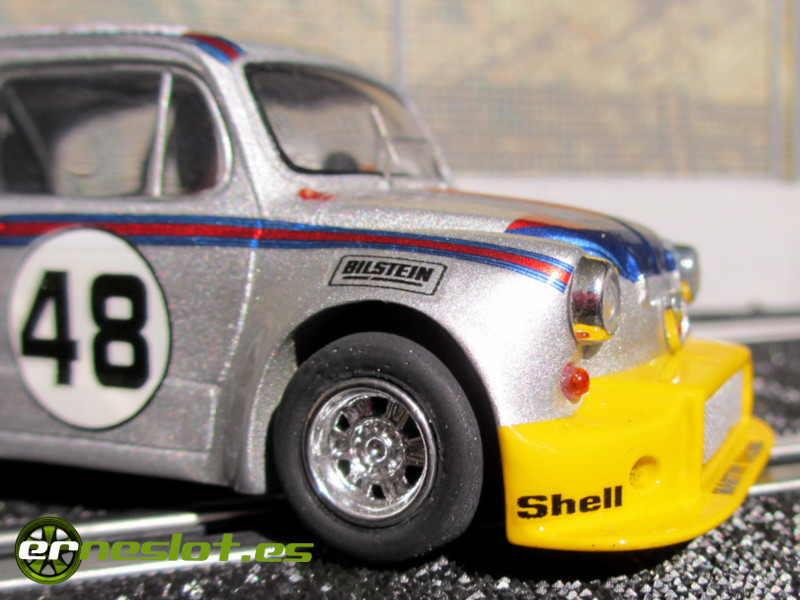
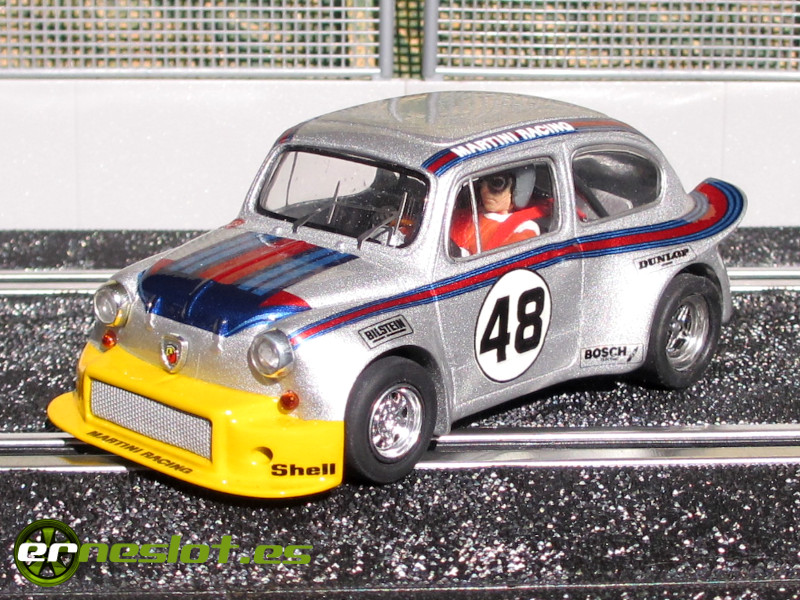
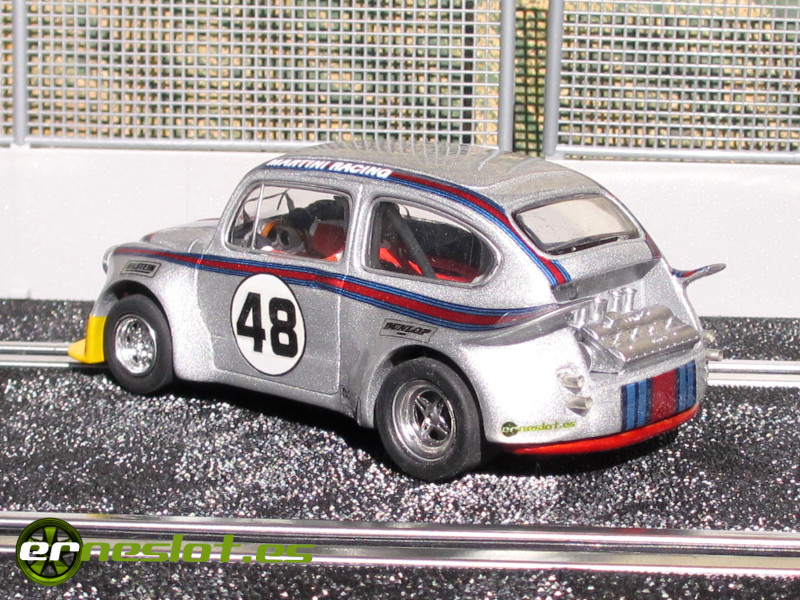
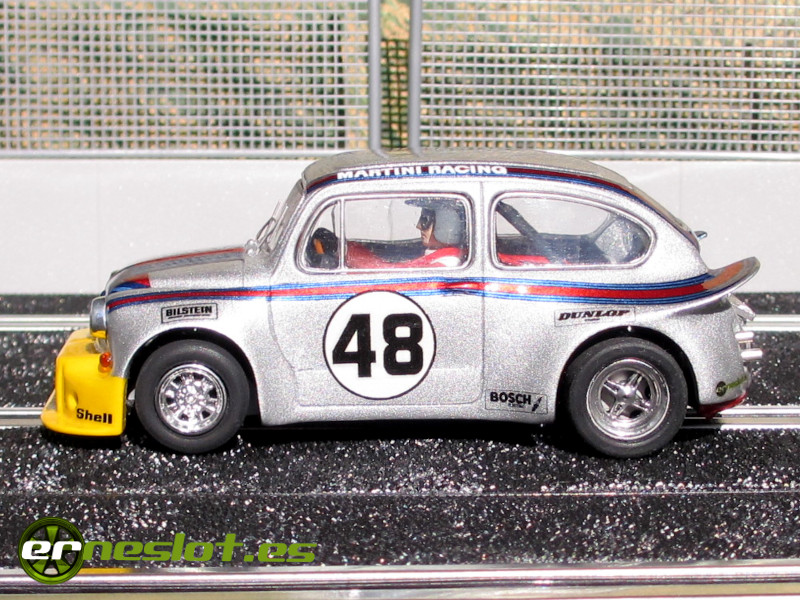
And this was the final result:
The car arrived in time to participate in the final race of the championship, nicknamed "Dumbo" due to the resemblance of the rear aerodynamic appendages to the ears of the famous flying elephant. It wasn't my intention to arrive so late, but I thought I wouldn't even be able to participate, so, well, it's a consolation, although it's really about participating from the beginning. The car wasn't performing badly, but it lacked fine-tuning, and it only managed four points in the single race it entered. At least it was easy to handle, something I haven't achieved with my other projects. Aesthetically, the result is what I wanted: very well-finished and attractive, so in that sense, I'm delighted. Regardless, I wanted to show it and participate in the Subdesaroller, because when they explained to me what the competition was about, it seemed like a breath of fresh air in the world of slot cars, which increasingly seeks pure performance and leaves very little room for imagination and crazy ideas like this. Long live the Subdesaroller!!
| Chasis | 3D printed by 3D SRP |
| Wheelbase | 63 mm. |
| Dimensions (L x W x H)<) | 109 x 64 x 54 mm. |
| Weight | 82 grs. |
| Motor | Scalextric RX-4 |
| Front tires | Reprotec |
| Rear tires | Mitoos M001 |
Fortnightly updates, new cars and more in www.erneslot.es


